
Articles


- Details
- Written by Latigo St.Marie
Ok. Even though the process isn't rocket science, this isn't exactly short. I'm posting all of the info I have from a 2 year period of successfully doing this. The main thrust of hBN is not to improve accuracy, but to prolong barrel life. When properly prep'd and slurry treated, your barrel can double and even triple it's expected accuracy life. These are excerpts from writings and emails to enquirers by my Father.
Every barrel in every rifle here but one has been treated. Not one projectile goes down range that isn't hBN inpact coated save those for one solitary Moly dedicated rifle. Your bore is going to make a difference right out of the gate. Both Moly and hBN have specific applications. Lab Grade Moly is typically 99.8% pure with a 1 to 3 micron size. hBN (far more preferrable in most bores) is typically negative 5 micron or smaller.
First, hBN. The patent shows it as being most effective on a standard steel bore, and has no effect on a 17-4 S/S Electro Polished bore, this because the negative micron particles cannot ingrain themselves into the surface and create the required ceramic protective coating.
hBN is not susceptible to moisture and thus does not allow corrosion to affect the lands/grooves of the bore. This is a rather large advantage over Moly.
The process is simple. If you've ever fired a copper jacketed projectile in your rifle, use a water based copper removal specific such as Wipe Out. Whatever you use, make sure its water based and ammonia free. Once you've borescoped and found the bore to be completely copper free, if the bore is .30 caliber, roll a .270 (or whatever, but a bit smaller diameter than your bore) caliber clean swab in a mixture of 100% Denatured Alcohol and hBN. Use a small, sealable pill bottle, glass or plastic to mix and store the slurry. The ratio should replicate a slurry the consistency of whole milk. Run it back and forth through the bore. Within half an hour I fire an impact coated projectile through the bore and that's it. The bore is effectively ceramic coated.
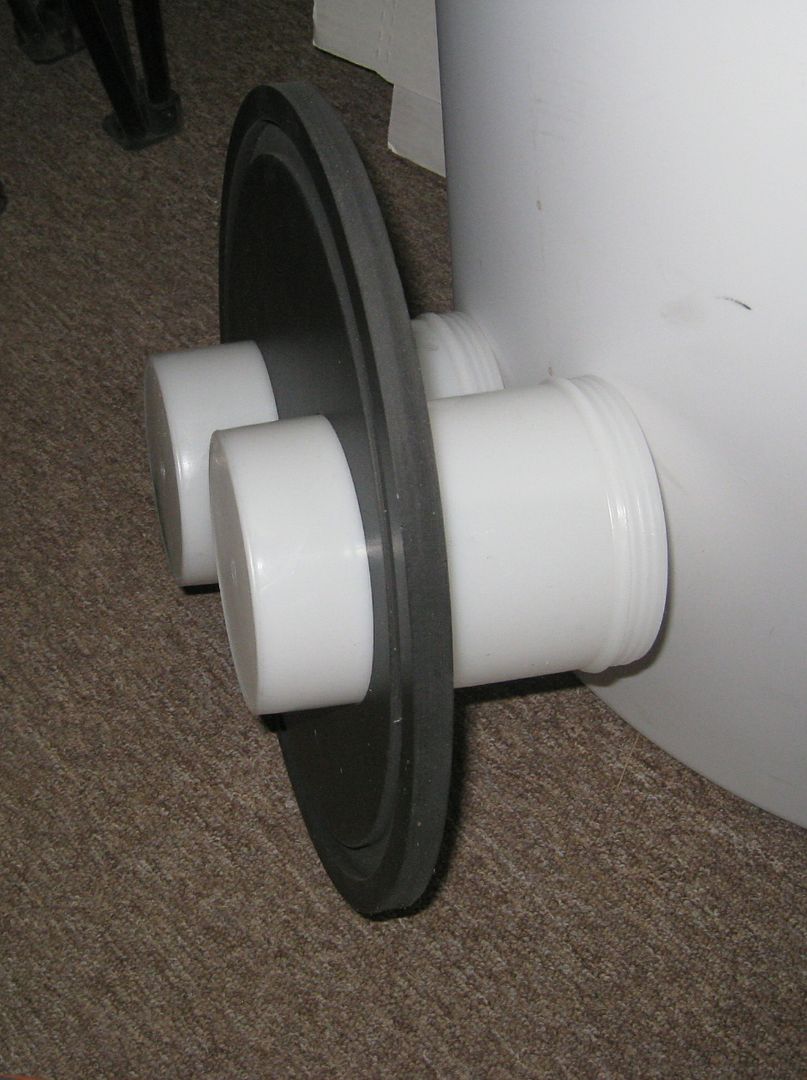
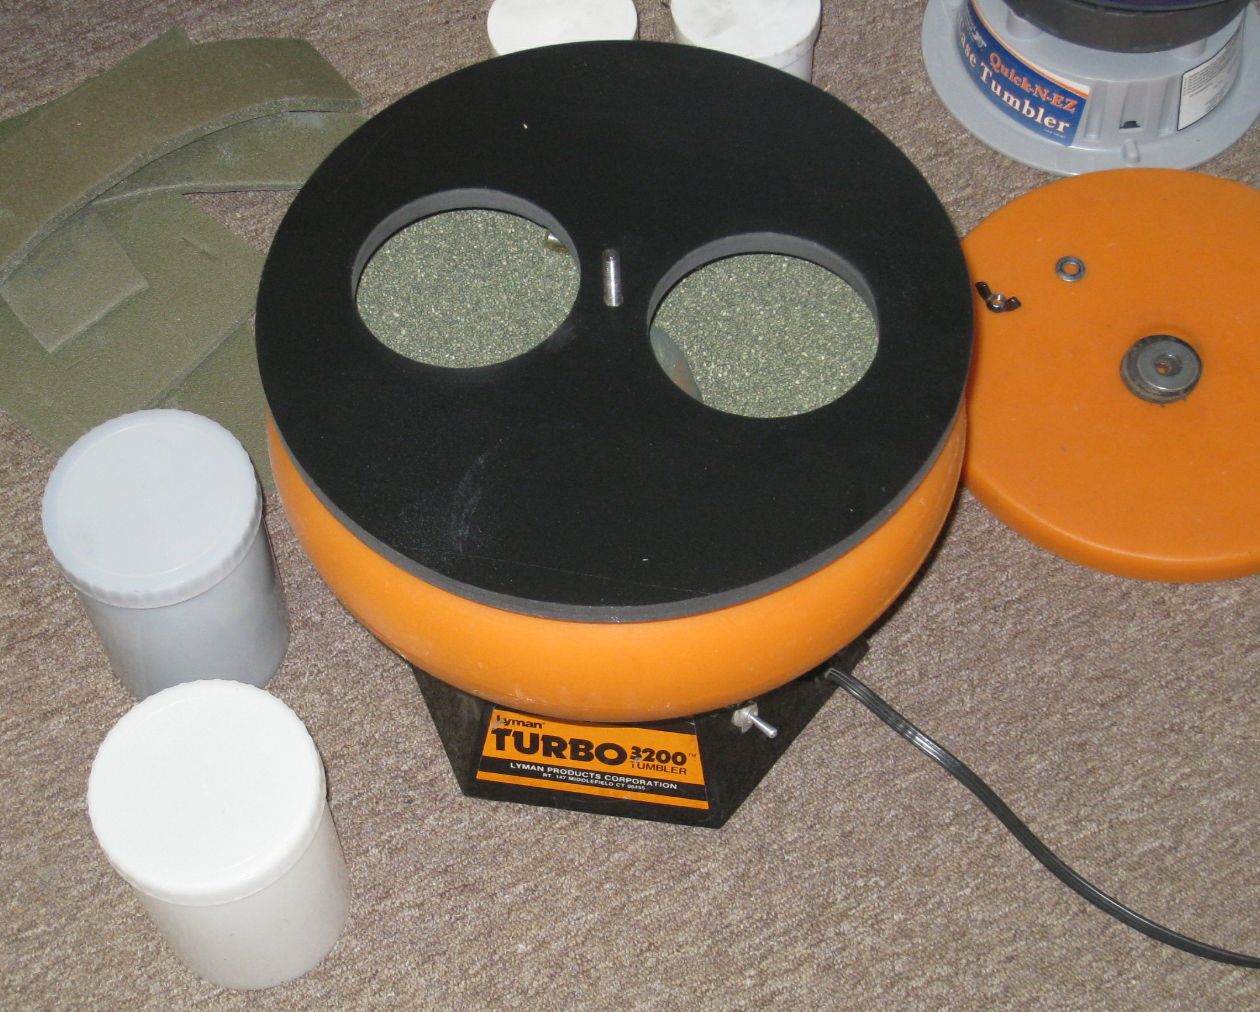
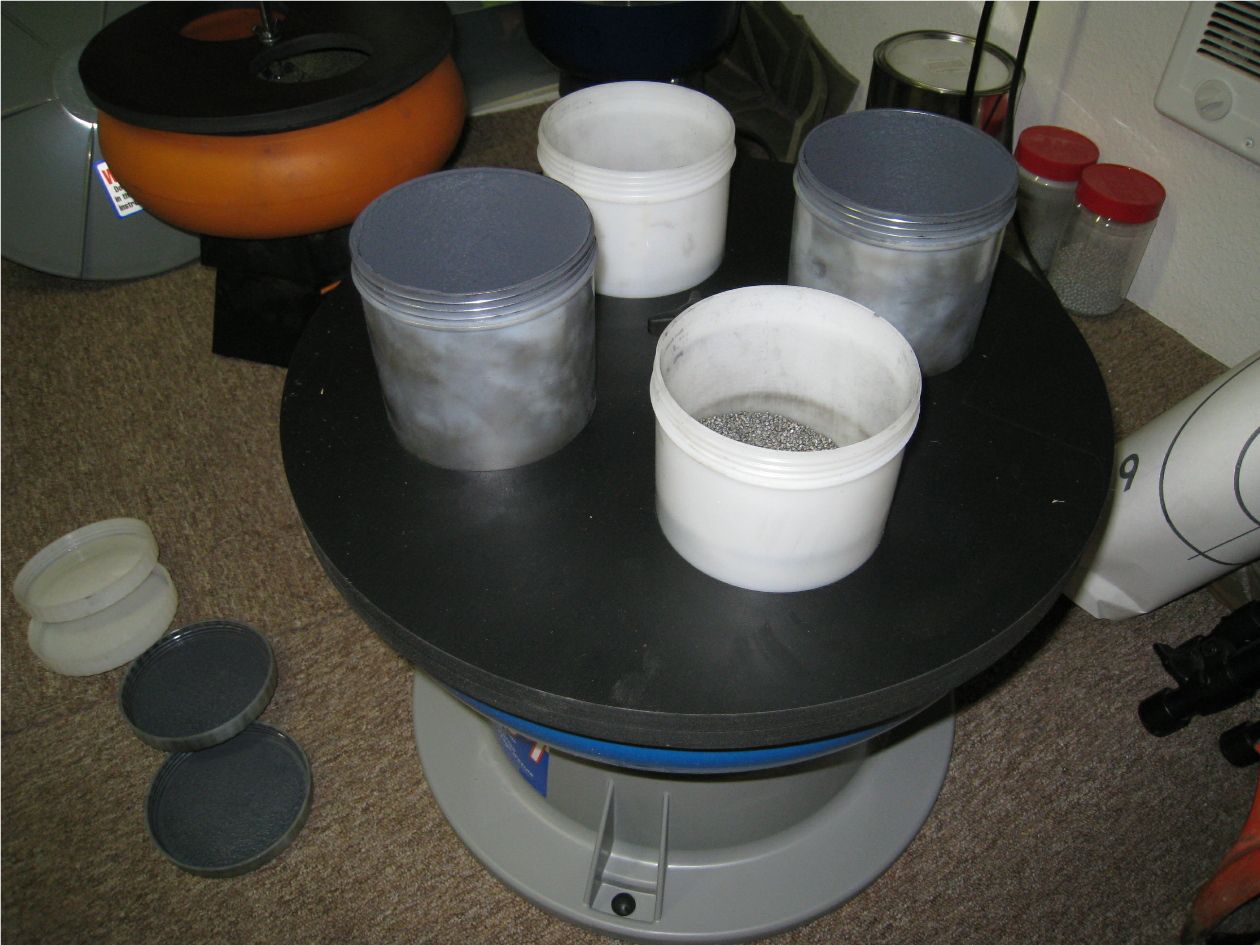
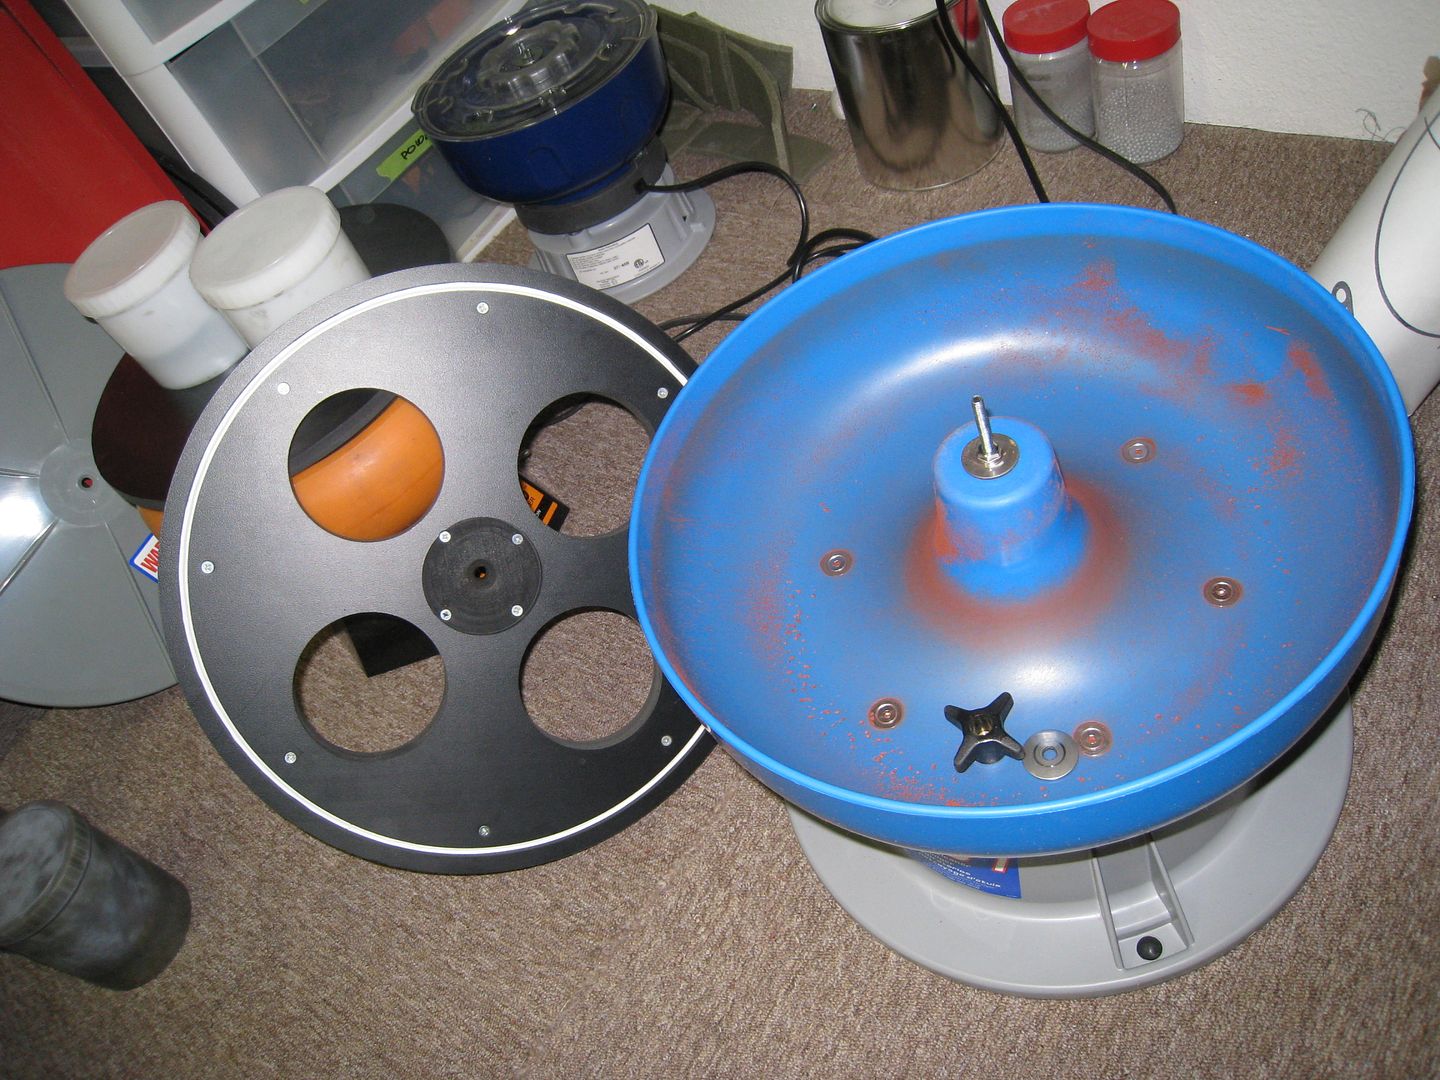
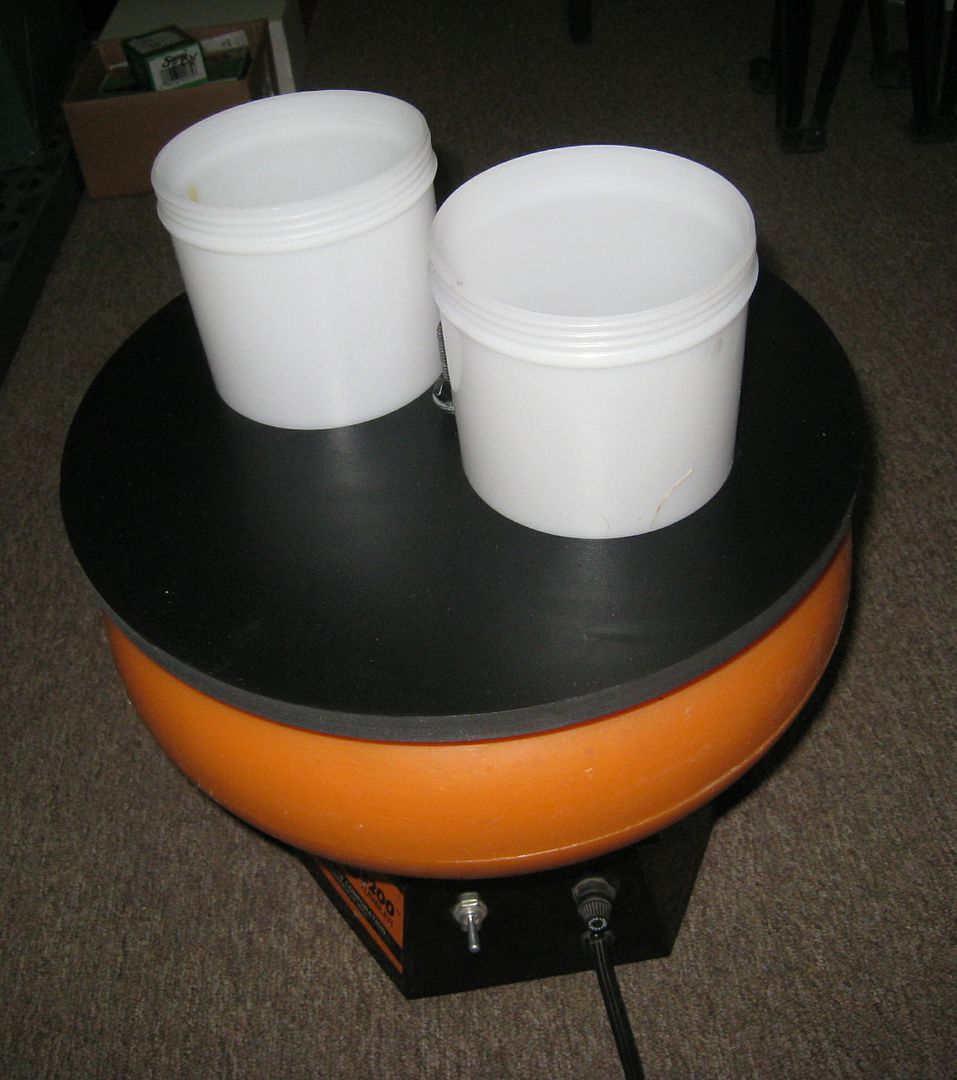
Everyone has a methodology and most involve pill bottles in the tumbler suspended in media. I don't. I use 16oz (and larger) plastic jars with screw on lids, and not inside the tumbler in in the media. I made a secondary lid for the tumbler/vibrator on a CNC. Its 1/2" thick Sintra with a 1/4" deep channel cut into the bottom to fit over the inside and outside edge of the tumbler. A 5/16" hole is drilled in the dead center to acommodate the shaft and wing-nut. All four jars are spaced evenly around the shaft on top of the lid. The tumbler is empty.
Dillon Commercial
Lyman Standard
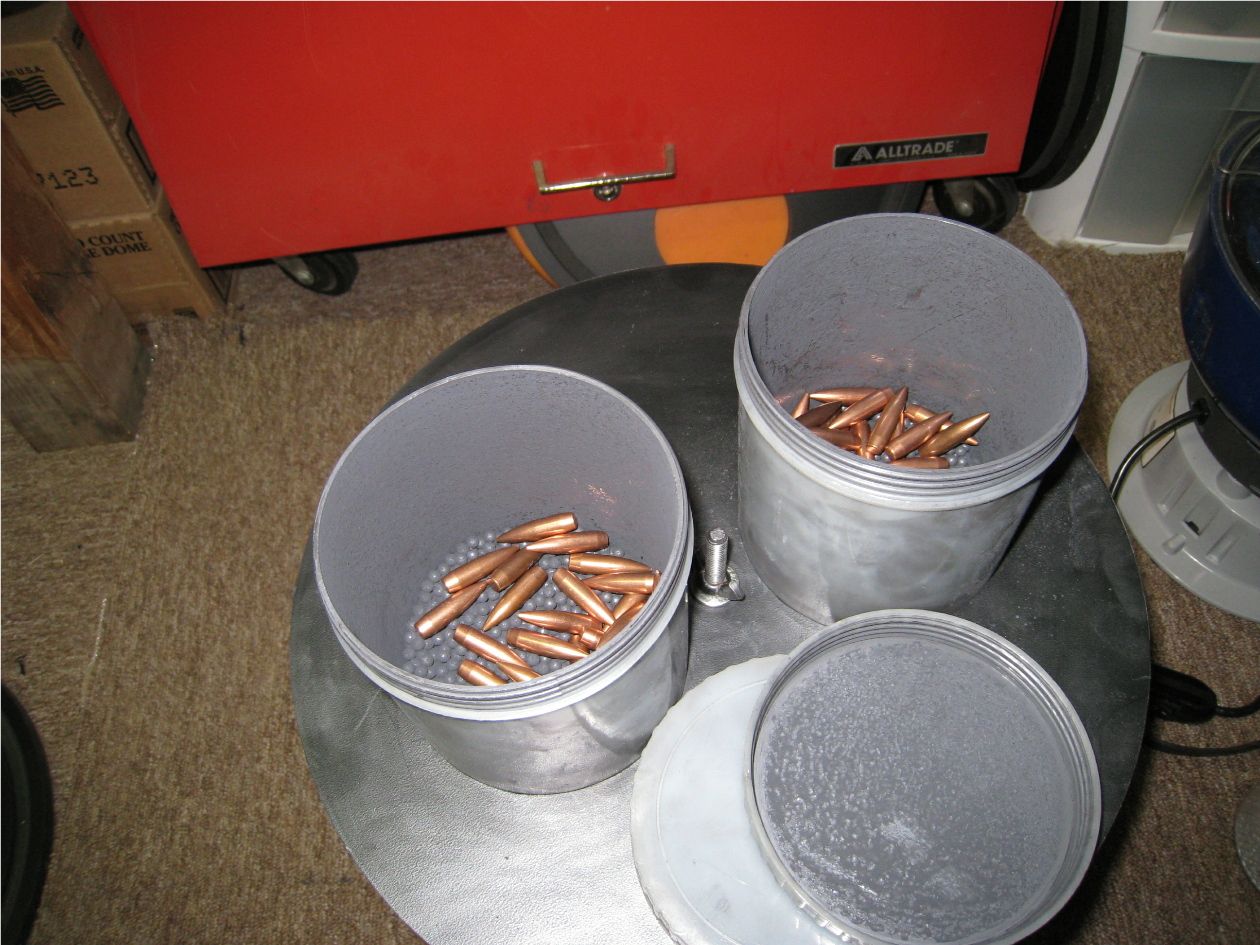
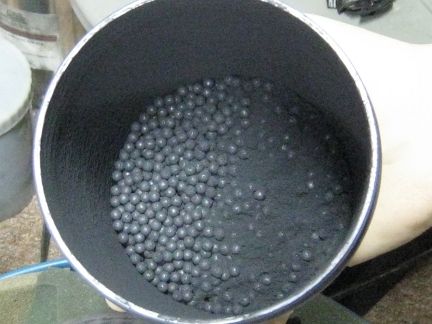
All four (or two) jars are filled to the 1/3rd mark with impact coated .177 steel bBBs. The BBs must be washed in Dawn with no additives or cleaned with a Sonic Vibrator and denatured alcohol. Add a nominal 1.5gr of hBN.
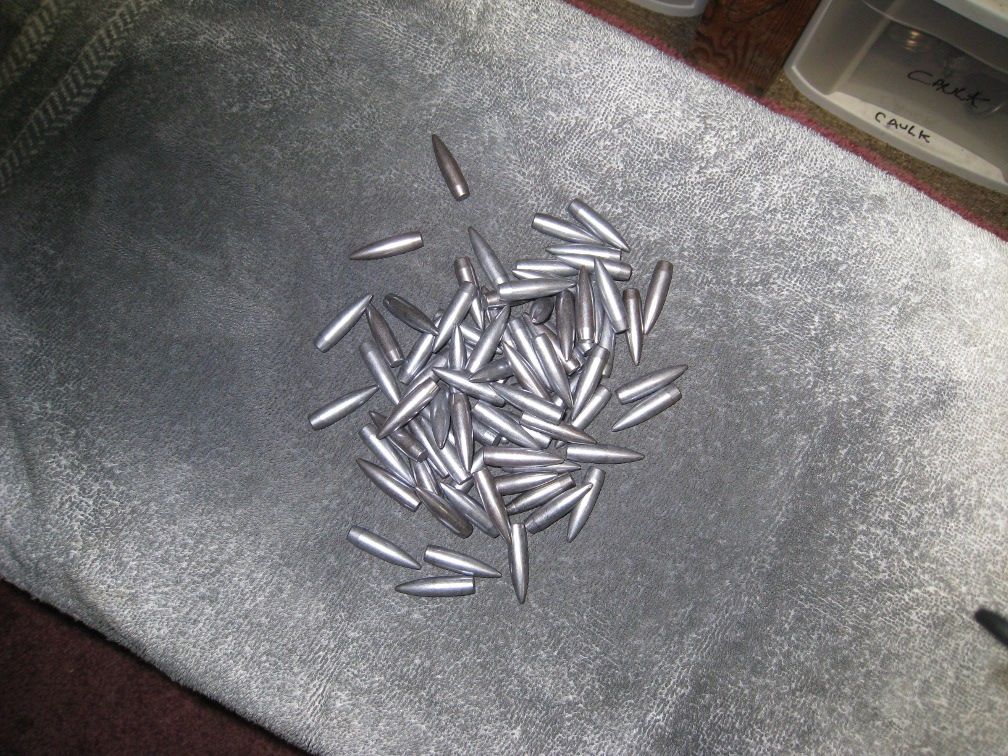
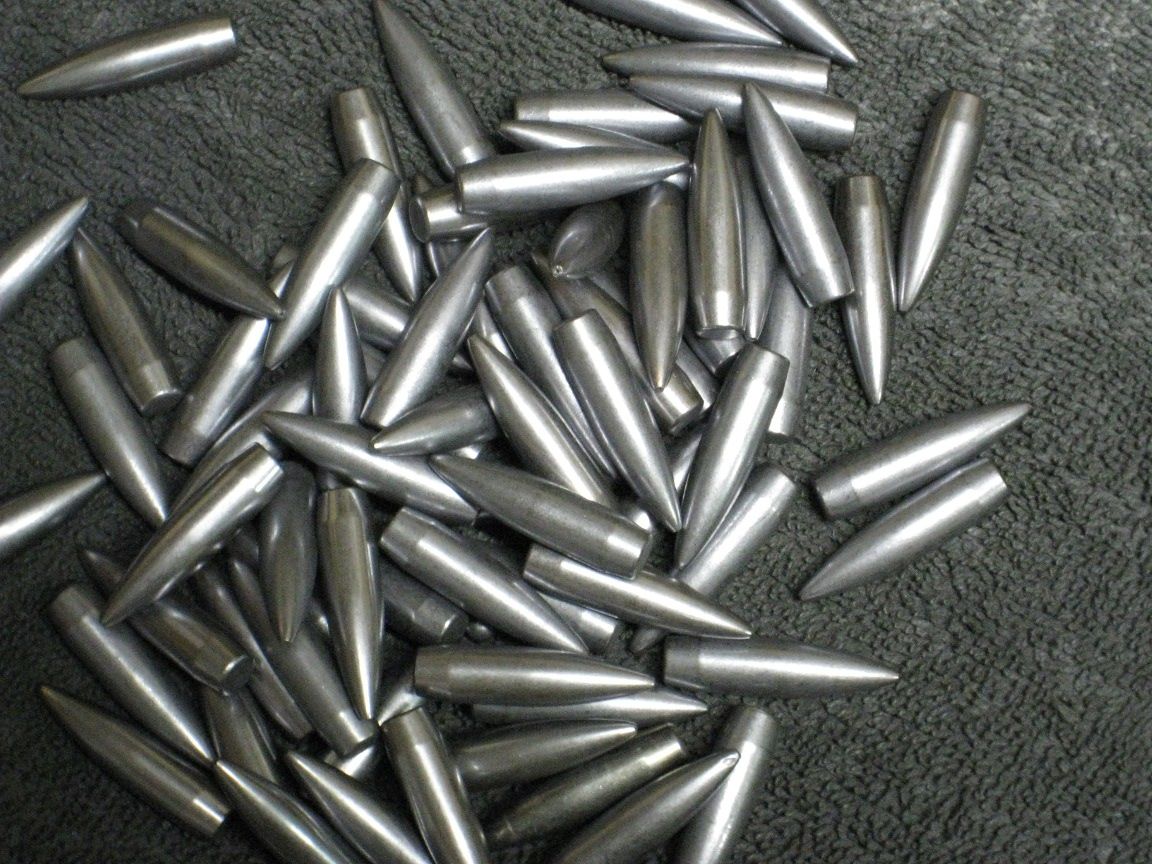
Place 50 .30 caliber (or whatever, untouched by human hands) clean projectiles in each jar, add a nominal .5gr of hBN and vibrate for three hours. The jars on top impact coat the projectiles easily 4 times harder and faster than in a pill bottle suspended inside the tumbler in media. Once the lids are screwed down tight, use a 1/2" wide strip of plastic tape around the area between the lid and the jar. Negative 5 micron hBN is so fine it can potentially find it's way through the threads.
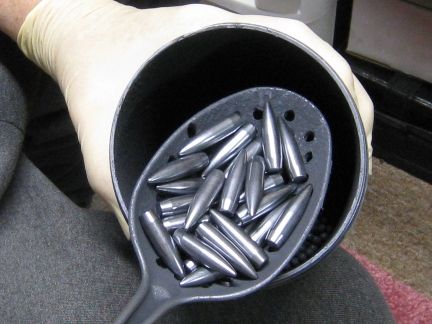
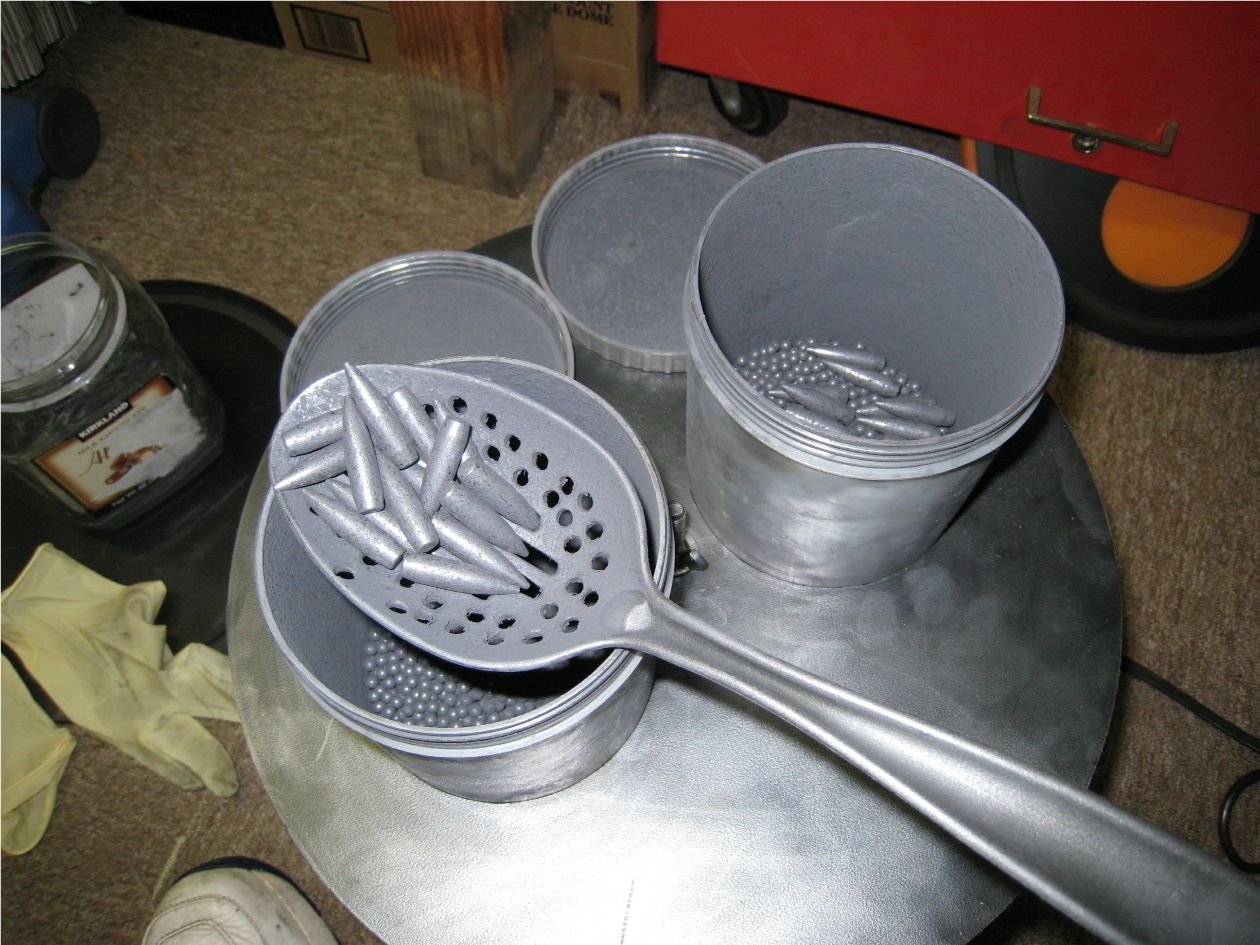
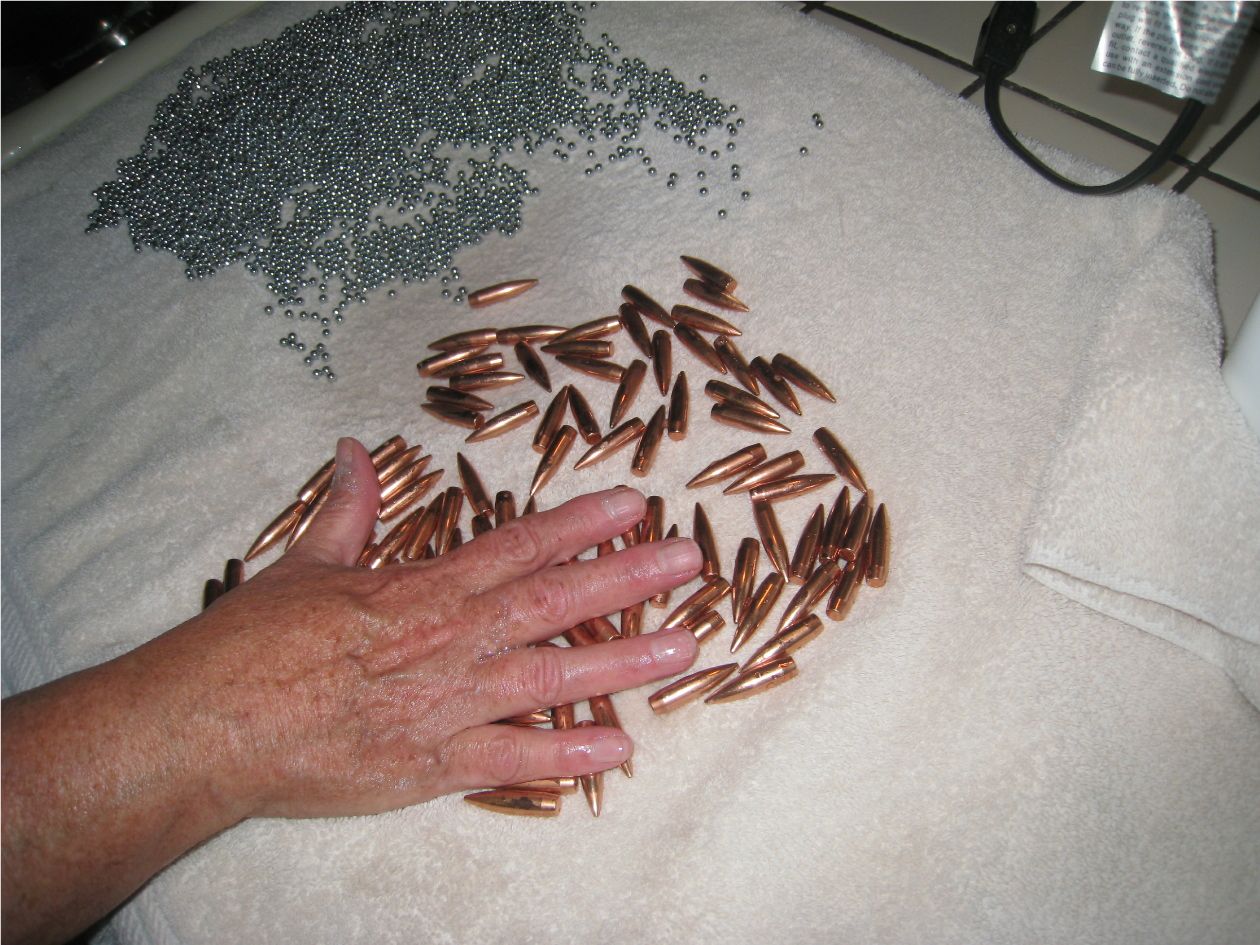
Use a large slotted spoon, (slotted wide enough to allow the impact coating BBs to fall through, but not the projectile)s to remove the impact coated projectiles from the jars and tumble them in a Terrycloth towel.
We begin by stripping the chambers, throats and bore with Wipe Out. Its an ammonia free, water based bore cleaner that removes literally everything. Carbon, copper, any kind of fouling including Moly. We leave the Foam Type Wipe Out in the bore and throat for about two hours then dry swab everything. We do a follow-up inspection for any copper residue with a Hawekeye Borescope. A complete, 100% copper free bore is essential.
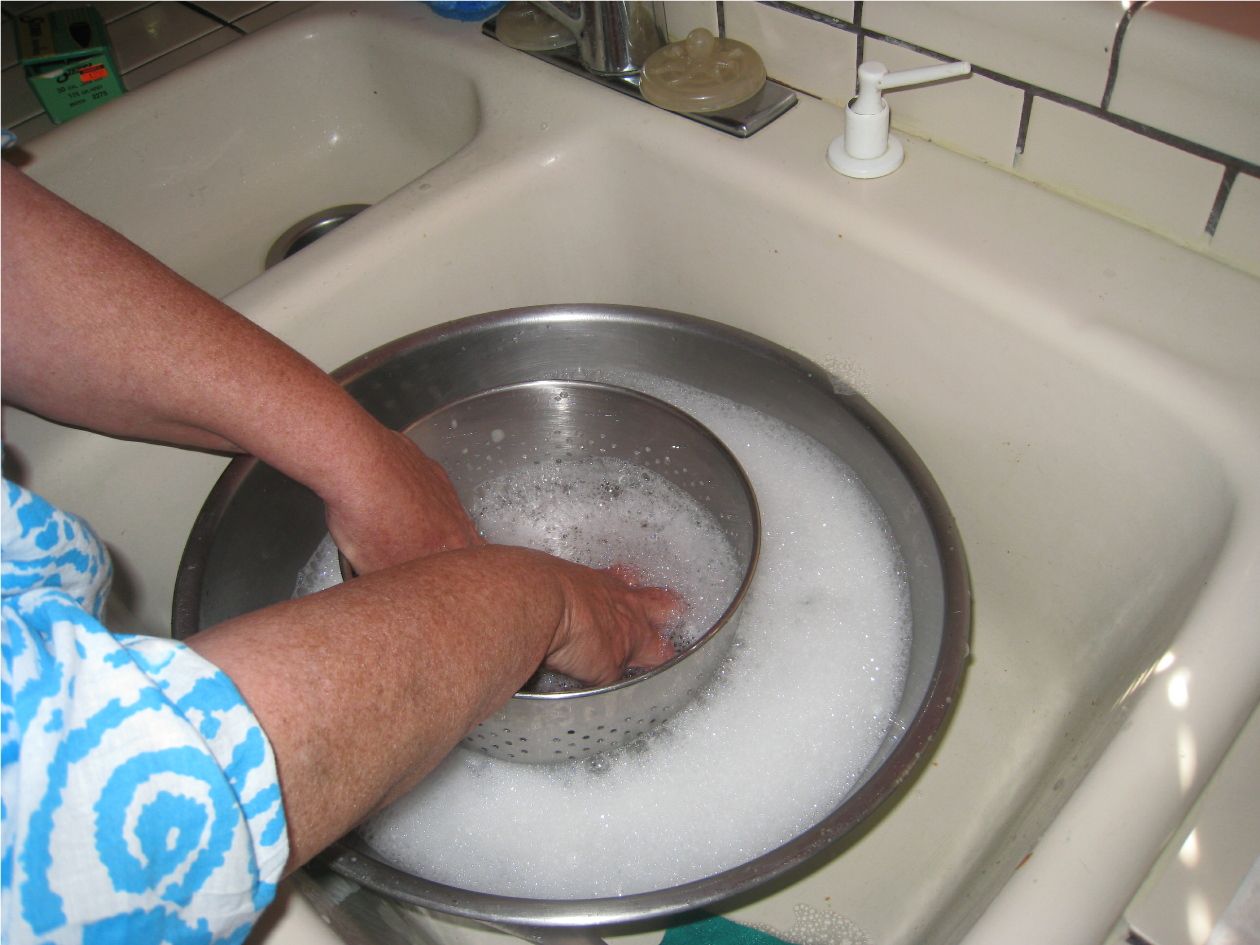
I wash the bullets in very hot, soapy water with Dawn. I use a bowl with a plastic strainer that just fits in it. Once washed, I thorougly rinse with hot water, not cold. From that point I handle the projectiles as little as possible and then only with disposable latex gloves. Assuming you've already treated the .177 steel BBs, you can put 50 to 75 .30 caliber or 100 smaller caliber bullets in each jar.
(Update)
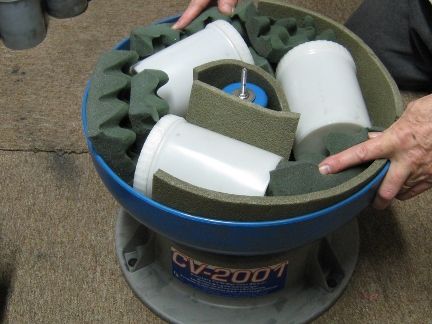
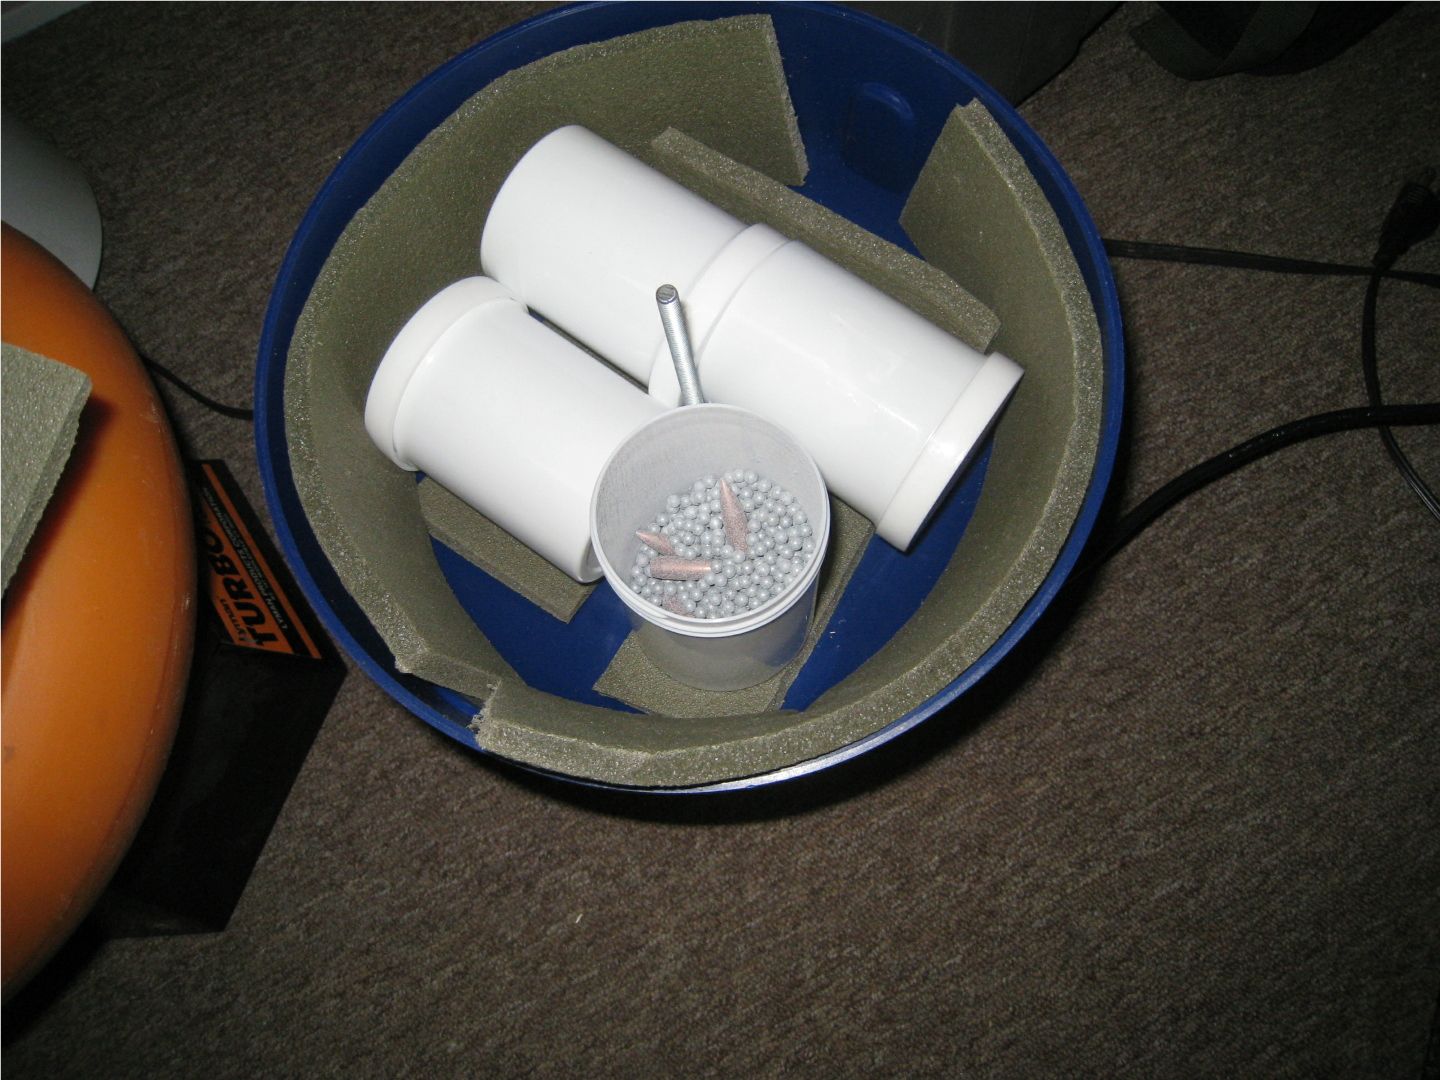
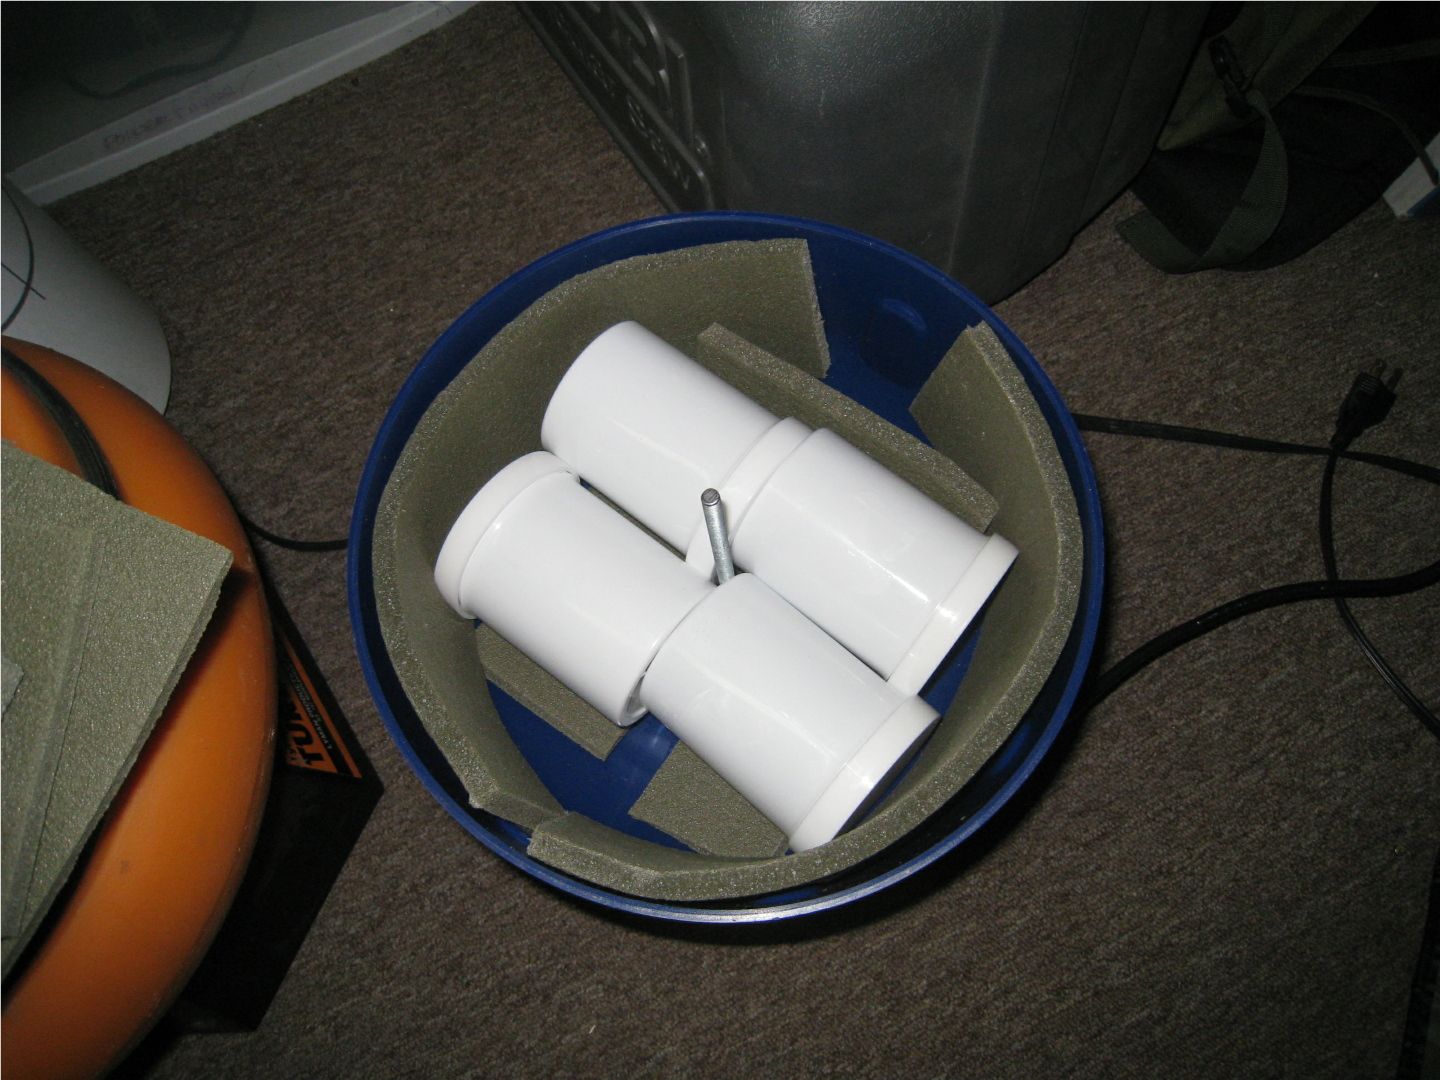
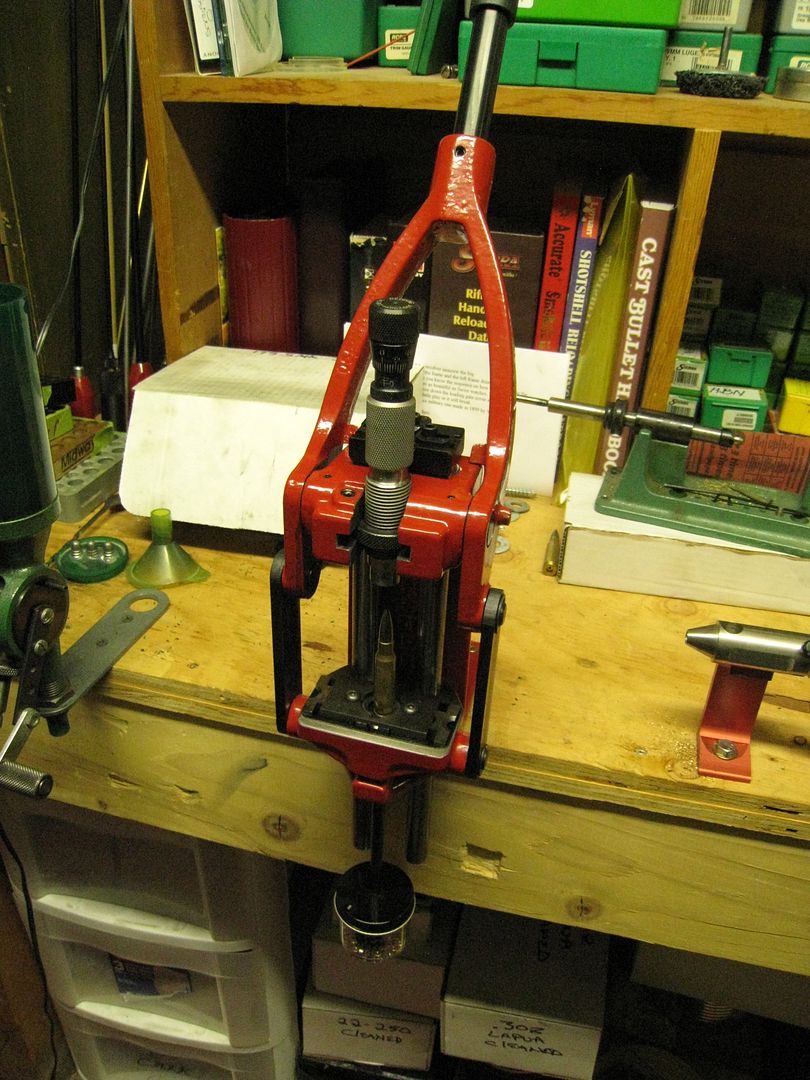
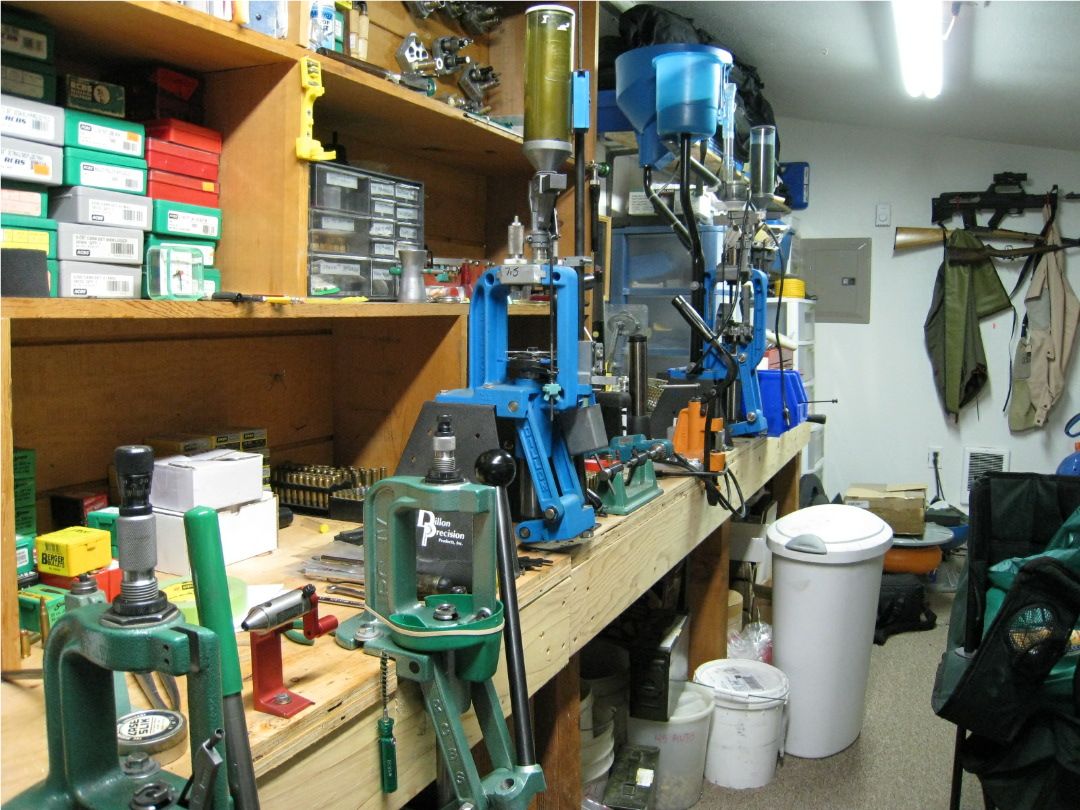
We've added to our method just a bit. We now place a thin layer of dense foam in the bottom of the Dillon. the jars are sealed where the top threads down onto the jar with plastic tape to keep any hBN from leaking out. We place the jars on their sides and pack them in with chunks of foam. We place enough foam on top of them so that when the vibrator lid is screwed down they're trapped tightly. This keeps everything horizontal and the bullets stay on the horizontal position. Works much better and you won't need a specialty lid for your Dillon. The attatched pics are of one of our smaller vibrators with two of the older jars we original used. We now use the new jars in the larger Dillon, but they do show how the jars are packed and kept horizontal.

With hBN, heat is definitely good but not entirely necessary. We use heat in the form of a Halogen body shop lamp. Placement of the lamp is critical for the well-being of your tumbler. Too close and you'll soften the plastic. Vibrate them for 3 hours. Remove them with a slotted spoon and tumble them in a Terry towel a few times. They'll come out perfect. This horizontal impact coating with steel BBs in a vibrator with no media makes them hit hard and fast, and that's the secret to perfect coating. Even small tipped bullets come out perfectly with no damage to the plastic tips at all.
This original system we developed works well too. The advantage is that you can add media in the tumbler/vibrator and clean cases while impact coating your projectiles. We still do this once in a while, so we often have both methods going at the same time.

This is the original patent if you're inclined to read it all. Sometimes its not easy to find the pertinent parts in all of this dry reading, but its all there. We've made a study of it, and we're very successful doing it. www.patentstorm.us/patents/7197986/description.html
(Note:)
If you don't have the foaming type Wipe Out for your bore, use the liquid Wipe Out with a nylon bristle brush, working up a heavy foam and let stand for a few hours.
Put the foam nozzle in from the breech and push down just once or twice. It expands tremendously. Wait till you see it appear at the muzzle, then you can plug the breech end with a fired case and a dry patch at the case mouth. Push it in tight.
Dry clean completely with patches or clean swabs.
Take a new .30 caliber cotton swab, or take your old ones and run them through the laundry or dishwasher. Dry completely.
Short switch back to square one:
You'll get your hBN in a container with a plastic, tape seal around the outside. Open it with extreme care and only long enough to fill a small, sealable pill bottle 1/3rd full. Re-seal the container immediately. Re-apply the exterior tape seal fully and tightly. Store at room temps in a secure place. Spill that container in a room in the house and your wife will be using a bat on you for weeks to come.
(No, I didn't, and my wife learned from mk,y nMother and uses porcelain Darning Eggs instead of bats!)
Screw the swab to the end of a cleaning rod just long enough to run the bore, open the hBN/Alcohol slurry pill bottle, roll the swab in the hBN/Alcohol slurry, (close the hBN bottle immediately) insert into the bore from the breech end if possible. If your rifle won't acommodate that, run it carefully from the muzzle end. Go all the way through and then work it gently back and forth while slowly withdrawing the swab.
The first impact coated projectile fired through the bore will do the ceramic coating for you, and that's it. You've done it. From that point on fire only impact coated projectiles through that rifle. Cleaning is done with dry patches, no chemicals at all.
For the chamber/throat area, use the right sized swab to fit into each and use Montana Extreme or a like carbon remover. Don't run any cleaning solvents down the bore.
If you feel the need to do that once in a while, cool...... but make sure you use the clean swab and do the hBN/Alcohol slurry process again. It only takes a few minutes. I unscrew the swab and keep it inside the slurry pill bottle so that it remains uncontaiminated.
To understand how it works, save me a bunch of typing and read the patent.
So how often do you clean an impact coated bore? 50 rounds? 100? 200? 300? 1,000? I don't know yet. No cleaning required so far, and if the patent is correct it will be a long time to come.
The Hawkeye Borescope always tells the glaring truth about your bore. After each shooting session I pass one dry patch down the bore, just once. So far in any and all of the bores thus treated.......... no necessity to clean at all. The most amazing has been the little .22 rifles.
Anything out to 200 yards we won't necessarily do this, but beyond that range we would.
This is our process. Your's may vary, but this has proven itself for us.
Projectile prep:
We only use Berger VLDs in our Swiss Rifles, but Sierra SMKs work really great too. 175 VLD's are not going to work in your AR 10 so you'll be using the 175 SMK's.
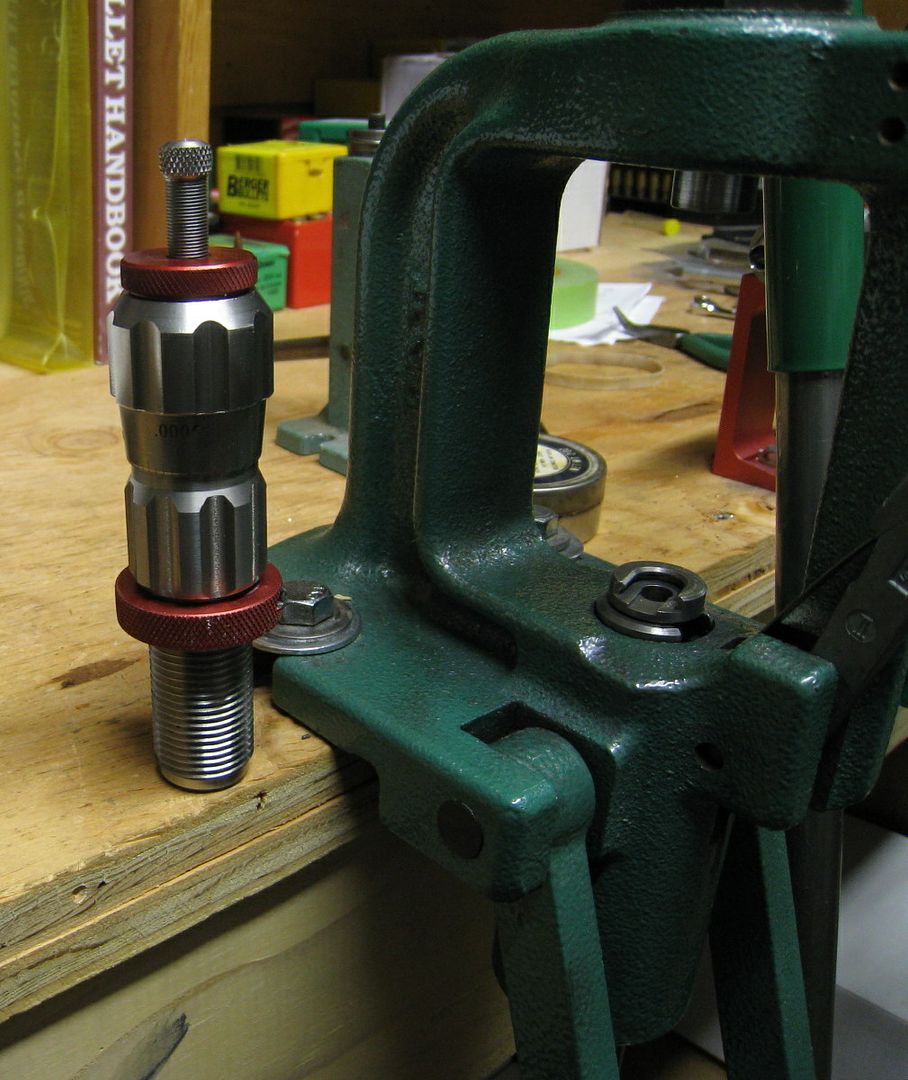
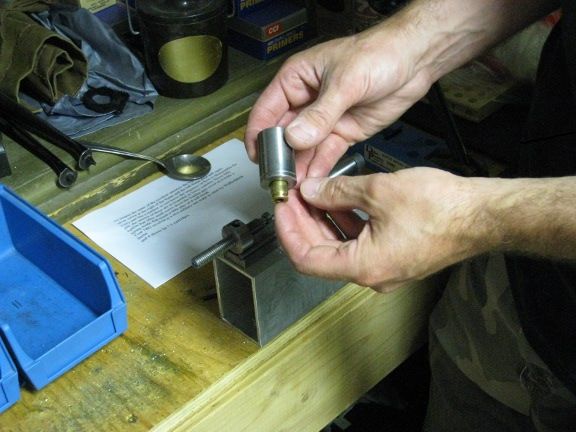
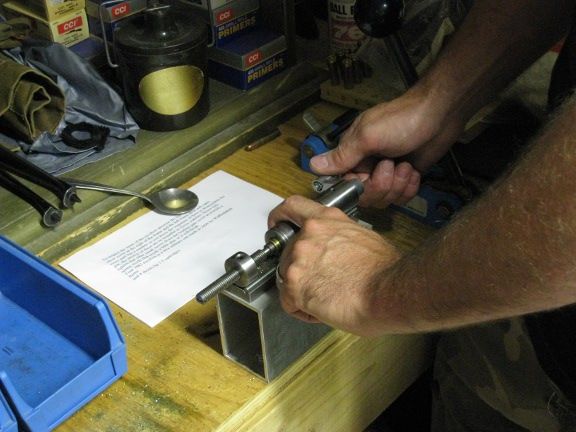
Our method is to begin with meplat trimming. We use the Hoover. Buy the sort that indexes on the ogive, not the base of the bullet. That's going to be very important when you cross reference/compare actual seat depth from the ogive to COAL, cartridge to cartridge later.
Untrimmed
Trimming process.
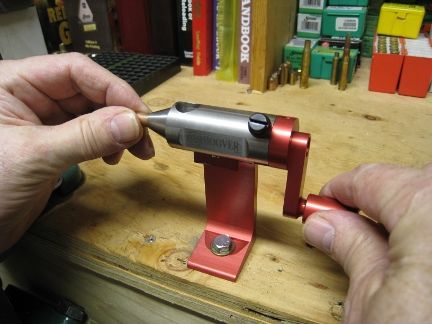
Trimmed

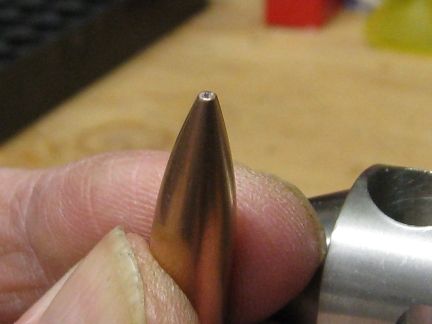
We then use a Hoover Pointer to reshape and center the hollow point and we taper it down to an opening that's approximately twice the thickness of the jacket wall.
Pointing
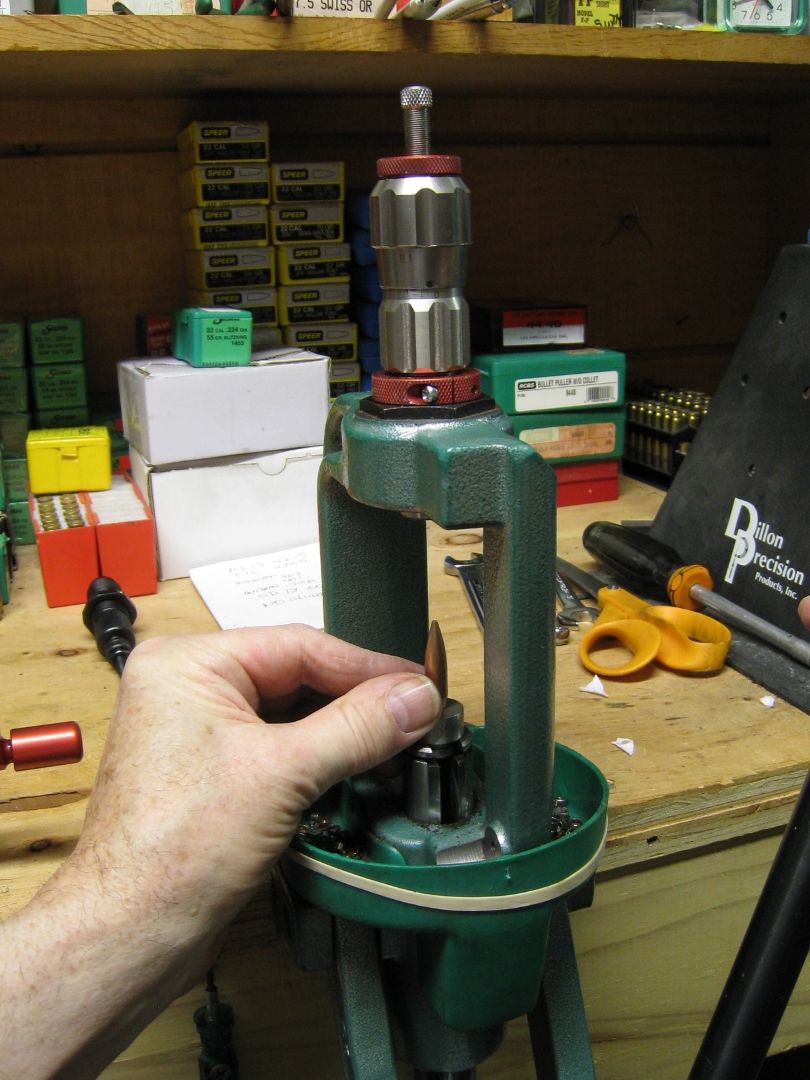
Pointed correctly
This is only the beginning of our overall case/projectile prep process.
- Details
- Written by Latigo St.Marie
I didn't realize how much interest there is in hBN. It really does make a huge difference in barrel life, so I'll repost it and leave it here.
Answering email after email from a dozen different boards is getting really to be a chore, so here it is.
Both Dad and I consider this procedure to be important for Swiss rifles since barrels are hard to come by and very difficult to replace.
Doubly important for those of us who own zfk55's. All other barrels are definite candidates unless your bore is Electro Polished. Even negative 8 Micron won't penetrate that. Electro polished bores are not usual at all unless it's a custom ordered barrel with that process.
First, an old email response that will help a lot, and its an evolving explanation.
Ok. Even though the process isn't rocket science, this isn't exactly short. I'm posting all of the info I have from a 2 year period of successfully doing this. The main thrust of hBN is not to improve accuracy, but to prolong barrel life. When properly prep'd and slurry treated, your barrel can double and even triple it's expected accuracy life. These are excerpts from writings and emails to enquirers by my Father.
Every barrel in every rifle here but one has been treated. Not one projectile goes down range that isn't hBN inpact coated save those for one solitary Moly dedicated rifle. Your bore is going to make a difference right out of the gate. Both Moly and hBN have specific applications. Lab Grade Moly is typically 99.8% pure with a 1 to 3 micron size. hBN (far more preferrable in most bores) is typically negative 5 micron or smaller.
First, hBN. The patent shows it as being most effective on a standard steel bore, and has no effect on a 17-4 S/S Electro Polished bore, this because the negative micron particles cannot ingrain themselves into the surface and create the required ceramic protective coating.
hBN is not susceptible to moisture and thus does not allow corrosion to affect the lands/grooves of the bore. This is a rather large advantage over Moly.
The process is simple. If you've ever fired a copper jacketed projectile in your rifle, use a water based copper removal specific such as Wipe Out. Whatever you use, make sure its water based and ammonia free. Once you've borescoped and found the bore to be completely copper free, if the bore is .30 caliber, roll a .270 (or whatever, but a bit smaller diameter than your bore) caliber clean swab in a mixture of 100% Denatured Alcohol and hBN. Use a small, sealable pill bottle, glass or plastic to mix and store the slurry. The ratio should replicate a slurry the consistency of whole milk. Run it back and forth through the bore. Within half an hour I fire an impact coated projectile through the bore and that's it. The bore is effectively ceramic coated.
Everyone has a methodology and most involve pill bottles in the tumbler suspended in media. I don't. I use 16oz (and larger) plastic jars with screw on lids, and not inside the tumbler in in the media. I made a secondary lid for the tumbler/vibrator on a CNC. Its 1/2" thick Sintra with a 1/4" deep channel cut into the bottom to fit over the inside and outside edge of the tumbler. A 5/16" hole is drilled in the dead center to acommodate the shaft and wing-nut. All four jars are spaced evenly around the shaft on top of the lid. The tumbler is empty.
Dillon Commercial
Lyman Standard
All four (or two) jars are filled to the 1/3rd mark with impact coated .177 steel bBBs. The BBs must be washed in Dawn with no additives or cleaned with a Sonic Vibrator and denatured alcohol. Add a nominal 1.5gr of hBN.
Place 50 .30 caliber (or whatever, untouched by human hands) clean projectiles in each jar, add a nominal .5gr of hBN and vibrate for three hours. The jars on top impact coat the projectiles easily 4 times harder and faster than in a pill bottle suspended inside the tumbler in media. Once the lids are screwed down tight, use a 1/2" wide strip of plastic tape around the area between the lid and the jar. Negative 5 micron hBN is so fine it can potentially find it's way through the threads.
Use a large slotted spoon, (slotted wide enough to allow the impact coating BBs to fall through, but not the projectile)s to remove the impact coated projectiles from the jars and tumble them in a Terrycloth towel.
We begin by stripping the chambers, throats and bore with Wipe Out. Its an ammonia free, water based bore cleaner that removes literally everything. Carbon, copper, any kind of fouling including Moly. We leave the Foam Type Wipe Out in the bore and throat for about two hours then dry swab everything. We do a follow-up inspection for any copper residue with a Hawekeye Borescope. A complete, 100% copper free bore is essential.
I wash the bullets in very hot, soapy water with Dawn. I use a bowl with a plastic strainer that just fits in it. Once washed, I thorougly rinse with hot water, not cold. From that point I handle the projectiles as little as possible and then only with disposable latex gloves. Assuming you've already treated the .177 steel BBs, you can put 50 to 75 .30 caliber or 100 smaller caliber bullets in each jar.
(Update)
We've added to our method just a bit. We now place a thin layer of dense foam in the bottom of the Dillon. the jars are sealed where the top threads down onto the jar with plastic tape to keep any hBN from leaking out. We place the jars on their sides and pack them in with chunks of foam. We place enough foam on top of them so that when the vibrator lid is screwed down they're trapped tightly. This keeps everything horizontal and the bullets stay on the horizontal position. Works much better and you won't need a specialty lid for your Dillon. The attatched pics are of one of our smaller vibrators with two of the older jars we original used. We now use the new jars in the larger Dillon, but they do show how the jars are packed and kept horizontal.
With hBN, heat is definitely good but not entirely necessary. We use heat in the form of a Halogen body shop lamp. Placement of the lamp is critical for the well-being of your tumbler. Too close and you'll soften the plastic. Vibrate them for 3 hours. Remove them with a slotted spoon and tumble them in a Terry towel a few times. They'll come out perfect. This horizontal impact coating with steel BBs in a vibrator with no media makes them hit hard and fast, and that's the secret to perfect coating. Even small tipped bullets come out perfectly with no damage to the plastic tips at all.
This original system we developed works well too. The advantage is that you can add media in the tumbler/vibrator and clean cases while impact coating your projectiles. We still do this once in a while, so we often have both methods going at the same time.
This is the original patent if you're inclined to read it all. Sometimes its not easy to find the pertinent parts in all of this dry reading, but its all there. We've made a study of it, and we're very successful doing it. www.patentstorm.us/patents/7197986/description.html
(Note:)
If you don't have the foaming type Wipe Out for your bore, use the liquid Wipe Out with a nylon bristle brush, working up a heavy foam and let stand for a few hours.
Put the foam nozzle in from the breech and push down just once or twice. It expands tremendously. Wait till you see it appear at the muzzle, then you can plug the breech end with a fired case and a dry patch at the case mouth. Push it in tight.
Dry clean completley with patches or clean swabs.
Take a new .30 caliber cotton swab, or take your old ones and run them through the laundry or dishwasher. Dry completely.
Short switch back to square one:
You'll get your hBN in a container with a plastic, tape seal around the outside. Open it with extreme care and only long enough to fill a small, sealable pill bottle 1/3rd full. Re-seal the container immediately. Re-apply the exterior tape seal fully and tightly. Store at room temps in a secure place. Spill that container in a room in the house and your wife will be using a bat on you for weeks to come.
(No, I didn't, and my wife learned from mk,y nMother and uses porcelain Darning Eggs instead of bats!)
Screw the swab to the end of a cleaning rod just long enough to run the bore, open the hBN/Alcohol slurry pill bottle, roll the swab in the hBN/Alcohol slurry, (close the hBN bottle immediately) insert into the bore from the breech end if possible. If your rifle won't acommodate that, run it carefully from the muzzle end. Go all the way through and then work it gently back and forth while slowly withdrawing the swab.
The first impact coated projectile fired through the bore will do the ceramic coating for you, and that's it. You've done it. From that point on fire only impact coated projectiles through that rifle. Cleaning is done with dry patches, no chemicals at all.
For the chamber/throat area, use the right sized swab to fit into each and use Montana Extreme or a like carbon remover. Don't run any cleaning solvents down the bore.
If you feel the need to do that once in a while, cool...... but make sure you use the clean swab and do the hBN/Alcohol slurry process again. It only takes a few minutes. I unscrew the swab and keep it inside the slurry pill bottle so that it remains uncontaiminated.
To understand how it works, save me a bunch of typing and read the patent.
So how often do you clean an impact coated bore? 50 rounds? 100? 200? 300? 1,000? I don't know yet. No cleaning required so far, and if the patent is correct it will be a long time to come.
The Hawkeye Borescope always tells the glaring truth about your bore. After each shooting session I pass one dry patch down the bore, just once. So far in any and all of the bores thus treated.......... no necessity to clean at all. The most amazing has been the little .22 rifles.
Answering email after email from a dozen different boards is getting really to be a chore, so here it is.
Both Dad and I consider this procedure to be important for Swiss rifles since barrels are hard to come by and very difficult to replace.
Doubly important for those of us who own zfk55's. All other barrels are definite candidates unless your bore is Electro Polished. Even negative 8 Micron won't penetrate that. Electro polished bores are not usual at all unless it's a custom ordered barrel with that process.
First, an old email response that will help a lot, and its an evolving explanation.
Ok. Even though the process isn't rocket science, this isn't exactly short. I'm posting all of the info I have from a 2 year period of successfully doing this. The main thrust of hBN is not to improve accuracy, but to prolong barrel life. When properly prep'd and slurry treated, your barrel can double and even triple it's expected accuracy life. These are excerpts from writings and emails to enquirers by my Father.
Every barrel in every rifle here but one has been treated. Not one projectile goes down range that isn't hBN inpact coated save those for one solitary Moly dedicated rifle. Your bore is going to make a difference right out of the gate. Both Moly and hBN have specific applications. Lab Grade Moly is typically 99.8% pure with a 1 to 3 micron size. hBN (far more preferrable in most bores) is typically negative 5 micron or smaller.
First, hBN. The patent shows it as being most effective on a standard steel bore, and has no effect on a 17-4 S/S Electro Polished bore, this because the negative micron particles cannot ingrain themselves into the surface and create the required ceramic protective coating.
hBN is not susceptible to moisture and thus does not allow corrosion to affect the lands/grooves of the bore. This is a rather large advantage over Moly.
The process is simple. If you've ever fired a copper jacketed projectile in your rifle, use a water based copper removal specific such as Wipe Out. Whatever you use, make sure its water based and ammonia free. Once you've borescoped and found the bore to be completely copper free, if the bore is .30 caliber, roll a .270 (or whatever, but a bit smaller diameter than your bore) caliber clean swab in a mixture of 100% Denatured Alcohol and hBN. Use a small, sealable pill bottle, glass or plastic to mix and store the slurry. The ratio should replicate a slurry the consistency of whole milk. Run it back and forth through the bore. Within half an hour I fire an impact coated projectile through the bore and that's it. The bore is effectively ceramic coated.
Everyone has a methodology and most involve pill bottles in the tumbler suspended in media. I don't. I use 16oz (and larger) plastic jars with screw on lids, and not inside the tumbler in in the media. I made a secondary lid for the tumbler/vibrator on a CNC. Its 1/2" thick Sintra with a 1/4" deep channel cut into the bottom to fit over the inside and outside edge of the tumbler. A 5/16" hole is drilled in the dead center to acommodate the shaft and wing-nut. All four jars are spaced evenly around the shaft on top of the lid. The tumbler is empty.
Dillon Commercial
Lyman Standard
All four (or two) jars are filled to the 1/3rd mark with impact coated .177 steel bBBs. The BBs must be washed in Dawn with no additives or cleaned with a Sonic Vibrator and denatured alcohol. Add a nominal 1.5gr of hBN.
Place 50 .30 caliber (or whatever, untouched by human hands) clean projectiles in each jar, add a nominal .5gr of hBN and vibrate for three hours. The jars on top impact coat the projectiles easily 4 times harder and faster than in a pill bottle suspended inside the tumbler in media. Once the lids are screwed down tight, use a 1/2" wide strip of plastic tape around the area between the lid and the jar. Negative 5 micron hBN is so fine it can potentially find it's way through the threads.
Use a large slotted spoon, (slotted wide enough to allow the impact coating BBs to fall through, but not the projectile)s to remove the impact coated projectiles from the jars and tumble them in a Terrycloth towel.
We begin by stripping the chambers, throats and bore with Wipe Out. Its an ammonia free, water based bore cleaner that removes literally everything. Carbon, copper, any kind of fouling including Moly. We leave the Foam Type Wipe Out in the bore and throat for about two hours then dry swab everything. We do a follow-up inspection for any copper residue with a Hawekeye Borescope. A complete, 100% copper free bore is essential.
I wash the bullets in very hot, soapy water with Dawn. I use a bowl with a plastic strainer that just fits in it. Once washed, I thorougly rinse with hot water, not cold. From that point I handle the projectiles as little as possible and then only with disposable latex gloves. Assuming you've already treated the .177 steel BBs, you can put 50 to 75 .30 caliber or 100 smaller caliber bullets in each jar.
We've added to our method just a bit. We now place a thin layer of dense foam in the bottom of the Dillon. the jars are sealed where the top threads down onto the jar with plastic tape to keep any hBN from leaking out. We place the jars on their sides and pack them in with chunks of foam. We place enough foam on top of them so that when the vibrator lid is screwed down they're trapped tightly. This keeps everything horizontal and the bullets stay on the horizontal position. Works much better and you won't need a specialty lid for your Dillon. The attatched pics are of one of our smaller vibrators with two of the older jars we original used. We now use the new jars in the larger Dillon, but they do show how the jars are packed and kept horizontal.
With hBN, heat is definitely good but not entirely necessary. We use heat in the form of a Halogen body shop lamp. Placement of the lamp is critical for the well-being of your tumbler. Too close and you'll soften the plastic. Vibrate them for 3 hours. Remove them with a slotted spoon and tumble them in a Terry towel a few times. They'll come out perfect. This horizontal impact coating with steel BBs in a vibrator with no media makes them hit hard and fast, and that's the secret to perfect coating. Even small tipped bullets come out perfectly with no damage to the plastic tips at all.
This is the original patent if you're inclined to read it all. Sometimes its not easy to find the pertinent parts in all of this dry reading, but its all there. We've made a study of it, and we're very successful doing it. www.patentstorm.us/patents/7197986/description.html
(Note:)
If you don't have the foaming type Wipe Out for your bore, use the liquid Wipe Out with a nylon bristle brush, working up a heavy foam and let stand for a few hours.
Put the foam nozzle in from the breech and push down just once or twice. It expands tremendously. Wait till you see it appear at the muzzle, then you can plug the breech end with a fired case and a dry patch at the case mouth. Push it in tight.
Dry clean completley with patches or clean swabs.
Take a new .30 caliber cotton swab, or take your old ones and run them through the laundry or dishwasher. Dry completely.
Short switch back to square one:
You'll get your hBN in a container with a plastic, tape seal around the outside. Open it with extreme care and only long enough to fill a small, sealable pill bottle 1/3rd full. Re-seal the container immediately. Re-apply the exterior tape seal fully and tightly. Store at room temps in a secure place. Spill that container in a room in the house and your wife will be using a bat on you for weeks to come.
(No, I didn't, and my wife learned from mk,y nMother and uses porcelain Darning Eggs instead of bats!)
Screw the swab to the end of a cleaning rod just long enough to run the bore, open the hBN/Alcohol slurry pill bottle, roll the swab in the hBN/Alcohol slurry, (close the hBN bottle immediately) insert into the bore from the breech end if possible. If your rifle won't acommodate that, run it carefully from the muzzle end. Go all the way through and then work it gently back and forth while slowly withdrawing the swab.
The first impact coated projectile fired through the bore will do the ceramic coating for you, and that's it. You've done it. From that point on fire only impact coated projectiles through that rifle. Cleaning is done with dry patches, no chemicals at all.
For the chamber/throat area, use the right sized swab to fit into each and use Montana Extreme or a like carbon remover. Don't run any cleaning solvents down the bore.
If you feel the need to do that once in a while, cool...... but make sure you use the clean swab and do the hBN/Alcohol slurry process again. It only takes a few minutes. I unscrew the swab and keep it inside the slurry pill bottle so that it remains uncontaiminated.
To understand how it works, save me a bunch of typing and read the patent.
So how often do you clean an impact coated bore? 50 rounds? 100? 200? 300? 1,000? I don't know yet. No cleaning required so far, and if the patent is correct it will be a long time to come.
The Hawkeye Borescope always tells the glaring truth about your bore. After each shooting session I pass one dry patch down the bore, just once. So far in any and all of the bores thus treated.......... no necessity to clean at all. The most amazing has been the little .22 rifles.
- Details
- Written by P. St.Marie
To determine proper seat depth for any given projectile, keep in mind that the measurement is only valid when the contact of the bullet's ogive and the lands/grooves is determined. Your manual says OAL is 3.020?... maybe for that bullet that they used, but only for that bullet profile, not all others. Projectile profiles vary from mfg to mfg.and application to application. So how do you do it?
There are any number of ways, but I've always used the same methodology. Take a sized, empty and unprimed, uncharged case, start a bullet into the case mouth leaving it protruding further than is apparently correct. Place it in the rifle's chamber by hand, ease the bolt into full battery and "smartly" eject it. Measure that OAL and seat it 2 to 4 thousandths deeper. This is a good start. Later, when you've become more deeply involved in data gathering, you may want to play with seat depths to find the sweet spot for your cartridge. I have specifics I use regularly.
Yes, there are other ways. If you like your way better .......use it.
Once you determine your chambered OAL for that bullet, screw your seating die down until the mouth of an empty case stops the descent and back it out a full turn. Lock the die in place and back out the seater. Note that a good seating die will index on the ogive, not on the tip of the bullet.
That method is only going to work for one bullet profile, and it its a hollow point its not going to be accurate anway since few meplats are the same even in the same box. Your bullet seater should be indexed behind the tip ahead of the ogive, not on the tip of the bullet. A Sierra 175 MK is not going to be the same as a Berger 175 VLD at all. Both should index on an area ahead of the ogive, but not all ogives are the same distance from either the case mouth or the bullet tip. If you use just the tip you're going to have two completely different freebores for the same caliber, weight and charge with likely two different results.
Now measure it and decide how far off the lands you want to begin. Note that figure and begin working out your load, adjusting seat depth as you go. But remember that was only for that bullet profile. Change profiles and you're back to square one.
P. St.Marie


- Details
- Written by Bernhardt
I re ceived an e-mail from the North Carolina Wildlife Resources Commission the other day reminding me that Dove season starts on September 2nd of this year. Consequently, this caused my mind to turn to fond memories of former opening days on which the doves were so numerous that the field I was hunting sounded more like a small arms war than a dove shoot and my shoulder was so sore at the end of the day that I could barely carry my shotgun back to the truck. Now, that magical time of year is at hand once again and my trigger finger is getting itchy just thinking about it!
However, despite the fact that I use a 12 ga. shotgun with #7 ½ shot and an Improved Cylinder or Modified choke, I still have an inordinate amount of trouble hittin’ the damn critters but, judging by the number of shots that are fired at any single, passing, dove over an actively hunted field, so do other hunters! Yet, there always seems to be that one fellow who has somehow magically figured out the correct amount of lead and thus, he seems to be able to down at least two birds with every three shots which always frustrates the fool out of me! However, if you ask them about how they are so successful at hitting a target the size of a tennis ball moving at just under the speed of light, all you ever get is a vague answer like “I just put the barrel in front of the bird and pull the trigger” or “If you are not hitting them, then you are probably shooting behind them”. Thanks y’all; I do appreciate the advice but I am afraid that it is not particularly helpful!
So, just how much do you lead one of Nature’s little rocket powered aviators when in the field? Well, I tried to tackle the answer to that question myself using mathematics but discovered that I did not have the necessary skills. Thus, I then turned to logic and I decided (erroneously) that since the shot is launched from shotgun barrel at roughly 1200 ft. per second, then it must take only a fraction of a second for the shot to cover the 60 ft. to 120 ft. to the dove passing in front of me and thus, it shouldn’t require more than a foot of so of lead. However, after experimenting repeatedly with differing lengths of lead, I still couldn’t seem to find the magic number. So, I did what I always do in these situations; I searched the Web! But, I after what seemed like hours chasing down leads, at the end of it all, I still had nothing definitive to go on.

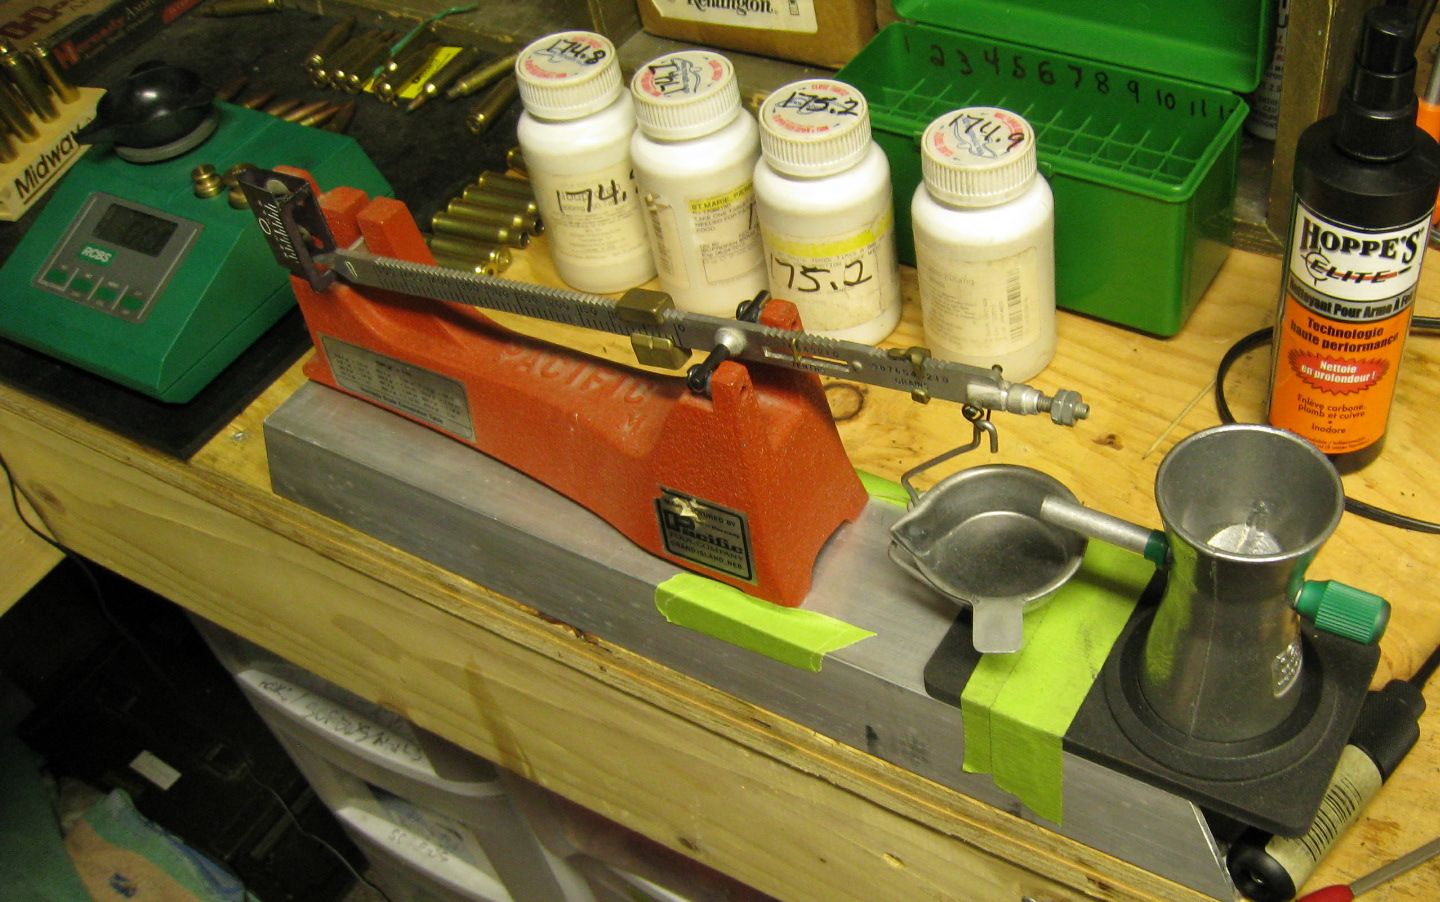
Then, I learned about Emmitt Nelson! Thank God for Emmitt Nelson!!! For those of you who are not familiar with this fine gentleman, in addition to being an avid bird hunter, Emmitt was trained and employed as a mechanical engineer. In addition, like many of us, he too missed a lot of shots. Therefore, feeling frustration similar to my own I’m sure, Emmitt decided to employ his facility with mathematics to determine just how much lead a hunter should hold depending on the size and weight of the shot he is shooting, the speed at which that shot exits the barrel, the fact that the shot slows down over distance traveled, and last but not least, the distance to the target and the speed at which it is traveling. Thus, after somehow magically juggling all of the numerous variables, Emmitt developed a set of tables which he calls Lead-O-Tables that explicitly display the nearly exact amount of feet in front of the bird the hunter should hold for various sizes of shot traveling at the common muzzle velocities for targets flying at different distances and at different speeds. Thus, to use Emmitt’s Lead-O-Tables, you first locate your shot size and the closest muzzle velocity to your round he has listed and then follow the Miles per Hour column down to the estimated speed of the target and then follow that row across to the estimated distance to the target and poof; the correct amount of lead is listed in feet! Finally!!!
So, where do you find this magical grimoire of wing shooting prowess? Well, the book is titled “Wing Shooting Lead” and it is written by Emmitt. J. Nelson.
Show 'em Off!
Add your rifle to the AR-10 Photo Thread!
All content of this site is copyright 2003 - 2017
AR-10(T)™, AR-10™, are trademarks of ArmaLite, Inc.®
AR10T.com is NOT endorsed or affiliated with ArmaLite, Inc.®
About AR10T.com
AR-10(T) is a community focused on rifles, optics, scopes, gear, accessories, and components used by the professional operator and skilled marksman. Enthusiasts, shooters, and gunsmiths alike contribute to our gallery, articles, and reviews Thank you for visiting!